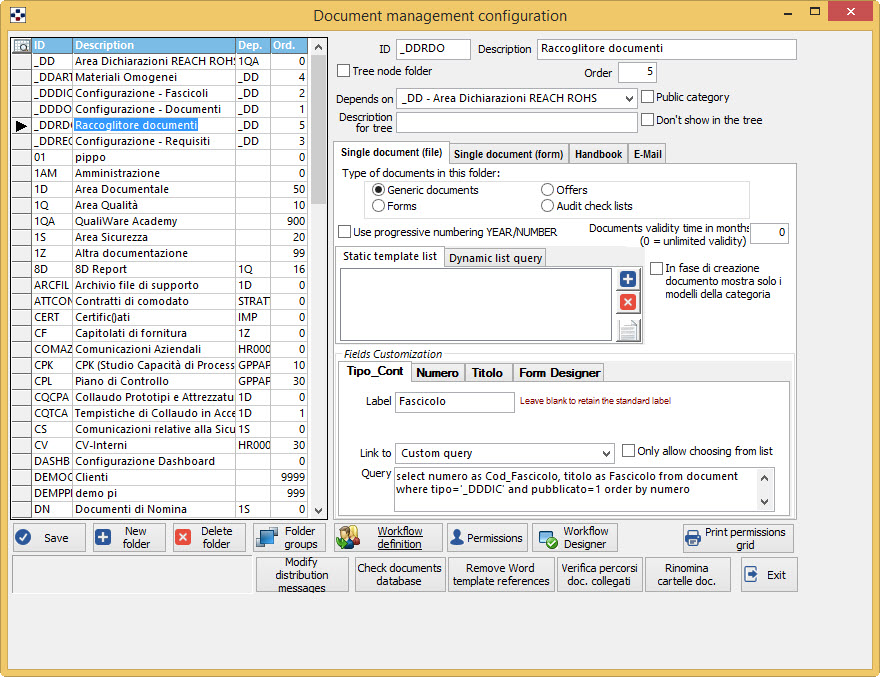
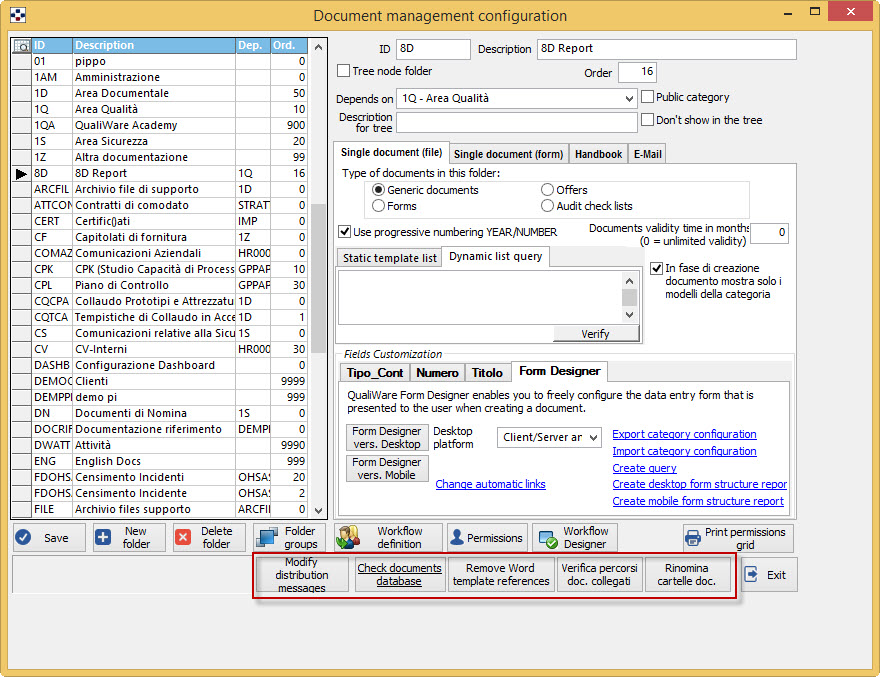
The Document Manager Configuration form appears as shown in the figure:
DEFINING A DOCUMENT CATEGORY
Press the button “New category“ and, in the fields “Code type” and “Description”, enter a code and a description of the category
By checking the box “fictitious Category (tree node)” you will not create a real documentation management category, but simply a node of the tree with the fuction of grouping other categories (fictitious or otherwise).
NOTE This field is editable only when you create a new category and before saving her. For a fictitious category you cannot define templates and ratings, as it does not contain any documents physically.
If you want, you can also give the category a particular name which appear in the tree, other than its official description: use the field description for the tree: if left blank, the description will coincide with that shown in the Description field. This field can come useful when you don’t want in the tree to be repeated a description that is already in the fictional mother category. E.g., if there are Procedures, Instructions and Manual relating to the Development Environment system, a fictional category called Environment will be created, from which will depend 3 categories that will have as description “Environment Procedures”, Environment Instructions” and “Environment Manual”, and as descriptions for the tree respectively, Procedures, Instructions and Manual.
If you want the new category to depend on a fictitious category, in the field depends on indicate the enclosing category, otherwise leave the indication <Root> which means the category will be assigned as the first node in all the documentation tree.
In the field “order”, must be specified a number for a progressive sort of categories, so that the display of categories may be even logic and not purely alphabetical (with the same number will be ordered for description).
If checked the field “Category” published documents of the category in question will be visible to all users for consultation, regardless of distribution.
The field’s checkbox “don’t show in the tree”, instead, makes sure that the category in question is not included in the document tree. If it is a Fictitious category, also hides all categories that depend on it.
SINGLE DOCUMENT
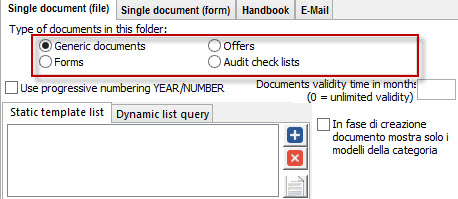
If it is a normal document, press the tab Single Document, and choose between:
-
Generic Documents are documents of free writing.
-
Forms characterize those documents partly protected, so as not to be editable if not in form fields, i.e. compilation-build fields.
-
Offers are those documents whose drafting passes through a specific data-entry form that collect special information of a commercial character.
-
Audit check lists if the category must go to establish a list of feedback for the Inspections.
You can set an expiration date for a particular category. By checking the box “use progressive numbering YEAR/NUMBER” the program automatically handles a year/number type of numbering, without the need for the user to remember to enter the year.
In the field “Documents validity time in month” indicate the number of months of validity for the category in question. At the time of publication, the program will automatically calculate the expiry date of the document, adding the months shown here to the publication date (the expiry date of each document can still be changed manually).
Documents of type “Handbook”
If the category need a manualistic type of setting, press the tab Handbook that will get a slightly different section: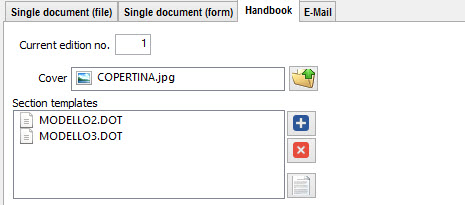
-
Specify a “current edition number”, useful especially if it incorporates a Manual already existing; otherwise, it will start from 0 or 1, as you prefer. Edition number, however, can also be changed from the Document Management form.
-
Create the Cover document by pressing the button
 which will open the form of the choice of model, in which you can choose a cover of other manuals or a document already existing; in the cover document that will be created, you can insert the table-index containing the chapters of the manual that will always update automatically: use the QualiWare Fields Menu in the toolbar, selecting the Index Table Creation:
-
define, where appropriate, the custom fields for which it is possible to manage dossiers like other documents (for the dossiers management, see the section).
Also for categories of manualistic type document you can use the Custom Fields and Collating
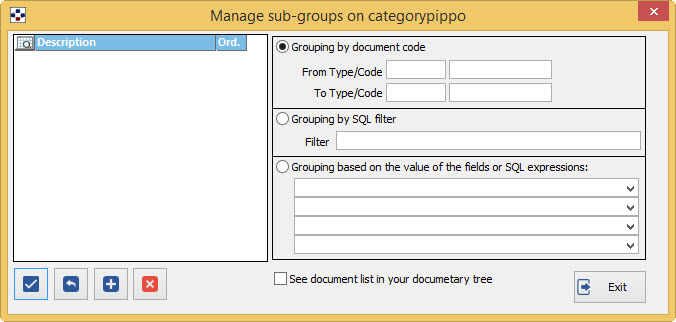
ARTICULATION OF A CATEGORY IN SUBGROUPS
You can divide each category into sub-groups in order to have a better view of the tree (see example). Press the button “Subgroups” which will open a special form .
To delete a category of documents, it is necessary that there are no files in that category (it is not necessary that there are no models or covers or Word temporary files; in these cases the elimination takes place anyway).
Select the category you want to delete and press the button “delete category”.
The button “edit posts” allows you to customize the texts of messages created by the program for the distribution of documents through a special mask.
CUSTOMIZING FIELDS
Customizing predefined fields
The built-in fields are mandatory, i.e. they cannot not be displayed because, for ISO standards, are fundamental requirements. Bu they can be customized in:
-
label: is the field header and can be left blank to keep the standard header; You can type a different name; You can decide not to display that field to the category in question, by typing here “#”.
-
link to: this feature allows you to connect the field to a registry of QualiWare, to parameterizable causal or to a list derived from a custom query:
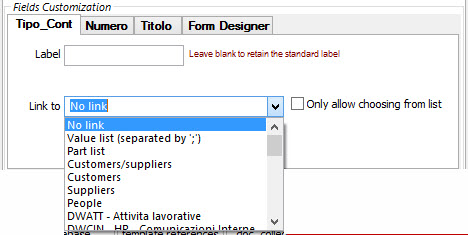
In this way, in the corresponding column in the documentary category, you can choose the reference from a defined list.
NOTE If, in addition to choosing from the linked list, you want to let the opportunity to add extra-list names, do not tick the box “allow only choice from the list”. If, viceversa, you want to limit the selection to only those names already encoded, tick it.
When to a custom field, you connect an articles registry or customer-supplier registry, is created a link of documents: each document of the category in question will appear between the linked documents of articles or customer-supplier corresponding to the codes entered into custom fields.
NOTE Only the default field “number” does not have the ability to insert a link, because it is a purely progressive-numeric mandatory requirement.
Advanced customization with Form Designer
Each documental category can be freely customized in very simple and intuitive way using the Form Designer.
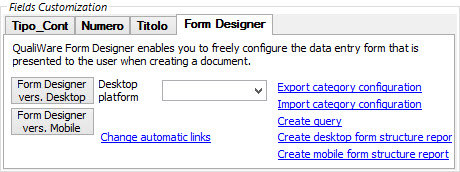
Press the button ” Form Designer Desktop vers.” to open the programming form.
It is also available, as shown in the figure, the “Form designer Mobile vers.” .
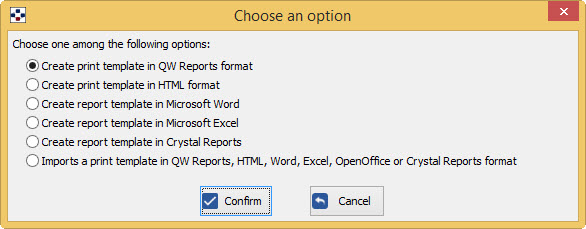
Setting the print template of a form
The category defined as “single document (form)”, have in addition the button “Define Form Report” that allows you to define the size of the form print, choosing among several options:
LINKS
In the “Customizing Fields”section, we find the following links:
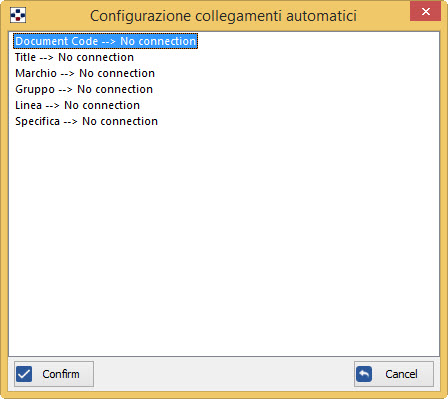
- The link Change automatic links opens a form that allows you to configure or modify automatic links for each field generated with the Form Designer.
- The link Create query, asking in advance to save the generated .sql file, automatically processes an sql query with the fields set in the form, specifically for that documentary category. On this query will then be possible to intervene to set filters or change the fields that appear.
- The link Create form structure report generates a report in html (to save even just a provisional in the proposal folder) with the structure of the form that you have created, so you have a prospect of fields, of their names, of their characteristics and of their links.
- the link Export category configuration permits to save the current category configuration, with a perspective of a future use.
- the link Import category configuration permits to import a category configuration, that had been created yet in the past.
DEFINITION OF DOCUMENT TEMPLATES
-
To create a new template , press the button
 which opens the window of choice of the template or the document on the basis of which to create the new model of the category in question.
 -
To modify an existing template, press the button
that directly opens the model itself.
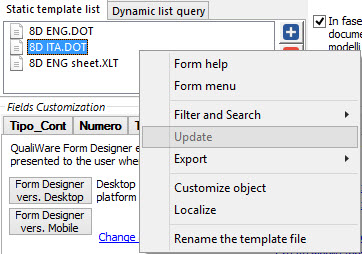
To change the name of the template file, open the pop-up menu with the right mouse button on the list of bulleted models and choose the entry Change template file name (in the absence of at least one model, the menu item is not displayed):
-
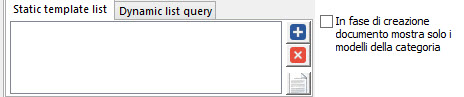
By checking the “In the document creation-time show only the category templates” flag, when you will create a document within this category, the template selection window will present only the models planned for the category itself (i.e. will not present other options normally planned).
Parameterization of models based on document data
Passing to the “dynamic list Query” tab, you can differentiate the list of templates to be presented in the creation of a new document, depending on the data entered in the “new document data entry” form.
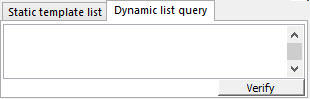
In the Notes field dynamic list query, insert query that will be executed at the time of presenting to the user the list of available templates. The query must:
-
be defined on the DOCUMENT table,
-
return TYPE, TYPE_CONT, and NUMBER fields and
-
be filtered on documental categories containing templates that you planned to use, as well as on specific documents.
INCLUSION IN THE MODEL OF IDENTIFYING DATA OF A DOCUMENT
In the document templates, you can define specific fields that contain the data that is defined by the Documentation Editing form, so that program itself will assign this data, to guarantee a correct indication of management references inside the document itself.
-
Place your cursor in your document where you want to insert the field.
-
Open the QualiWare Fields menu and choose the data you are interested in: when you create a new template, in fact, in the General menu of Microsoft Word, and Microsoft Excel custom toolbar is present a special menu item: QualiWare Fields, which contains all the informative fields that come from the program and that can be inserted in the document, divided into three categories :
UTILITIES RESERVED to the SYSTEM ADMINISTRATOR
“Edit distribution messages”: opens the window that allows you to set or change the text of the automatic messages.
“Check documents database”: make a check to detect and report any anomalies.
“Removing Word templates references”: removes from Word files the references to models that no longer exist, to avoid excessive delays in opening the documents.
“Check connected documents paths”: check and, if necessary, change the paths of the files linked.
“Rename documents folder”: allows you to change the name of the documents folder on the file system.
ENABLING DOCUMENT CONFIGURATION
The configuration of the documents is permitted only for the System Administrator.
However, the administrator can assign configuration ratings only to certain categories also to other people who are not System Administrators. In particular, the administrator can establish that one or more people can configure categories dependent on a first level fictitious category. Enabled users in this way by the administrator will have access to this Document Management Configuration form in relation to the document area which have been enabled. They will, for example, create new categories, customize custom fields, etc.
IMPORT AND AUTOMATIC ARCHIVING OF E-MAILS
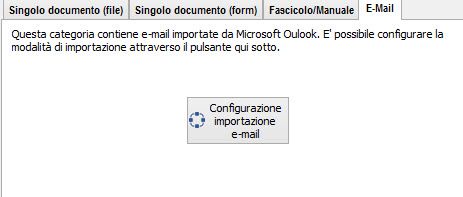
It is possible to import and store in QualiWare the e-mails contained in one or more mailboxes in Microsoft Outlook.
To this end, you must Configure a separate documentary category, by selecting from the menu of category the tab “E-Mail”, which will display the following button: “import e-mail Configuration”, pressing it, it will open special form.