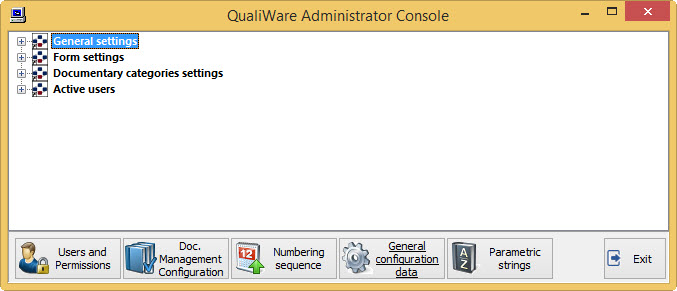
“The Administrator Console” form is look like in Figure:
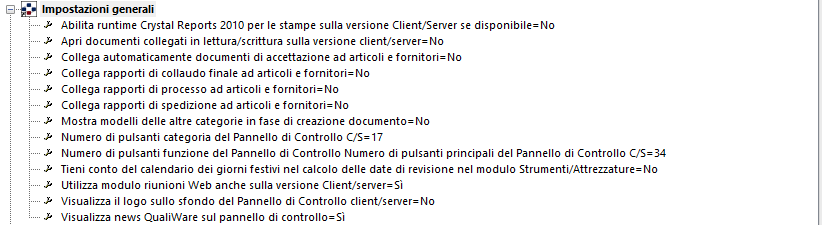
GENERAL SETTINGS
In this section you can define some basic parameters, valid on General form configuration:
To change the settings:
Select the item that you want to modify, by mouse press the right button, getting the Edit menu:
![]()
press ![]() to confirm.
to confirm.
press ![]() to cancel.
to cancel.
NOTE:the function “Use Web meeting module also on the Client/server version”, if is setted “yes“, from client/server version is always activated the web mask when is recalled the function “Meeting Management” or when is open a meeting’s link.
FORM SETTINGS
This group includes all forms related to functions enabled in QualiWare configuration.
Press the button”![]() ” that opens the list of available settings:
” that opens the list of available settings:
To change the configuration option, double-click on the data you want. This will open a field with a drop-down box that provides the available options:
![]()
-
Leaving the option <not defined> the choice (display or not the linked documents) remains to the user.
-
Choosing Yes or No, instead, the user can no longer change it.
NOTE If the form has no workflow the option chosen is irrelevant. There will be no repercussions.
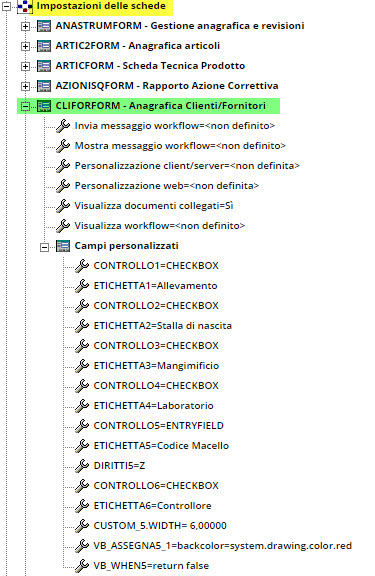
Custom fields
If you want to insert in a form some custom fields to, without there being the need to change other visual aspects you can add fields under “Custom fields“:
Data are stored in the QWAGG table, SECTION as <form’s class name>.
NOTE If the field is not already in the database, it must be added in the appropriate table.
So that the added fields such customizations are easily identifiable within the record layouts, it is recommended to put before the prefix “P_”.
Table “KEY-CONTROL Values” (identify the type of object to be created):
| STRINGA | ENTRYFIELD | Immissione di stringhe |
| NUMERO | NUMBERFIELD | Immissione di numeri |
| VALUTA | MONEYFIELD | Immissione di valuta |
| TEMPO | TIMEFIELD2 | Immissione di tempi |
| CASELLA | CHECKBOX | Casella di spunta |
| DATA | DATA | Immissione di date |
| DISCESA | COMBOBOX | Casella a discesa |
| NOME | COMBONOMINATIVI2 | Scelta di un nominativo |
| NOTE | NOTE_EDITOR | Immissione di testo su più righe |
| BOTTONE | PUSHBUTTON | Pulsante |
The table below summarizes the meaning of the “CUSTOMISING KEYS”
| DatalinkN | Nome completo del campo del database collegato all’elemento che si sta aggiungendo al form secondo il formato: <nome archivio>.<nome campo> |
| EtichettaN | Etichetta che deve comparire accanto all’elemento che si sta aggiungendo. |
| ControlloN | Tipo di controllo che si sta aggiungendo(Vedi tabella “Valori chiave “controllo””) |
| DirittiN | Lettere identificative del ruolo che può modificare il campo |
| WhenN | Condizione di entrata sull’oggetto |
| PaginaN | Numero della pagina del form dove visualizzare l’oggetto |
| MascheraN | Formato di visualizzazione (Valido per i campi numerici). Es. 999,999.99 |
| DatasourceN | Solo per oggetti di tipo DISCESA: elenco degli elementi da visualizzare nella casella a discesa, separate da virgole e racchiusi fra apici. |
| FiltroN | Solo per oggetti di tipo NOME: codice letterale del ruolo di cui visualizzare nella casella a discesa, tutti i nominativi che lo ricoprono. ESEMPIO: filtroN =’E’Mostra nella lista a discesa solo gli utenti cui è stato assegnato il ruolo avente codice ‘E’ (nel caso del Modulo Non Conformità tale codice corrisponde al ruolo di “Redattore”). |
| AssegnaN_M | (Solo versione C/S): Assegnazione di una qualsiasi proprietà dell’oggetto. |
| VB_whenN | (Solo versione WEB): specifica il codice da eseguire per abilitare o disabilitare l’accesso al campo. Deve essere sempre presente una istruzione “return <booleano>”. Possono essere presenti più istruzioni separate da “:”, ma l’ultima deve essere sempre la “return”.(*)ESEMPIO: |
| Vb_assegnaN_M | (Solo versione Web): Assegnazione di una qualsiasi proprietà dell’oggetto, nel formato “<nome proprietà>=<valore>”(**)ESEMPIO: |
(*) In the case of the Web version, the instructions inserted are compiled when the session starts.
After each change is therefore necessary to restart your session to verify the actual functionality.
A syntax error could block the access to QualiWare, and will be reported in the error message at startup.
(**) Present from 2015.04a onwards.
Form with custom fields
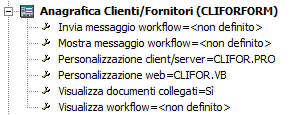
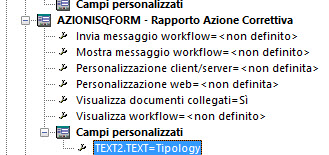
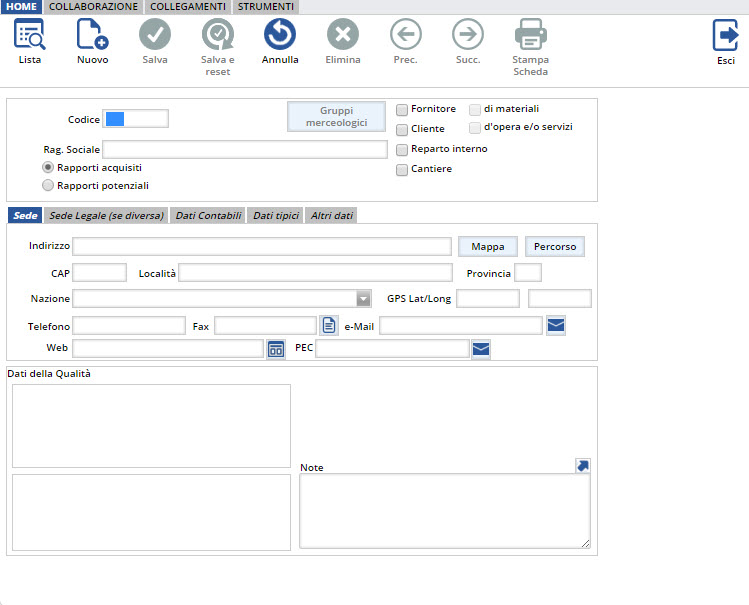
The form “Master Data Customers and Suppliers” (CLIFORFORM sheet), as standard looks like this:
once you add the following custom fields shown in the figure:
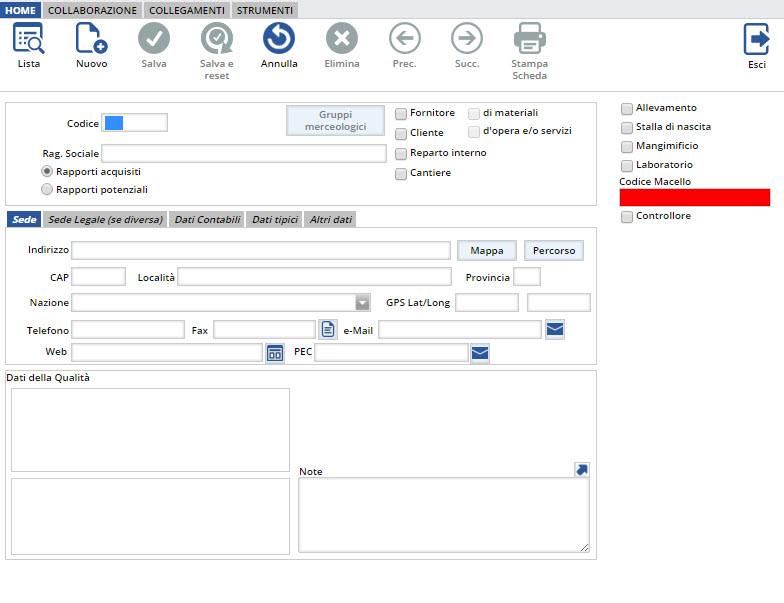
Note how the custom fields are displayed on the right side of the form.
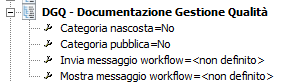
SETTING THE DOCUMENT CATEGORIES
For the documentary categories, the available settings are:
About the setting of sending and viewing of the workflow message, it’s the same to what was seen in the options a. and b. above.
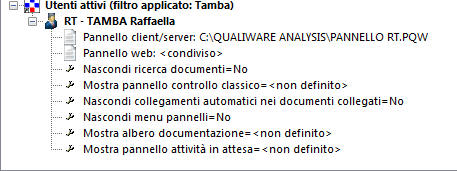
ENABLE USERS
For each enable user, you can define the following configuration options:
-
The options Client/server panel and Web Panel opens a window of Windows Explorer, to search for any custom panels.
-
The options Hide documents search and Hide panels menu allow the values “Yes” and “No” and let you hide the corresponding functions.
-
The option Hide automatic links in linked documents, if set to “Yes”, to suppress the display of automatic links individually for each user.
-
The options View classic Control Panel, View documentation tree and View pending task panel allow the values “undefined”, “Yes” and “No”, which have the following meaning:
– undefined: the choice whether or not to display the Panel is left to the user
– Yes: always display panel and the user cannot close it
– No: never shows the Panel
On each option, by clicking the right mouse button, is opened the following menu:

-
Edit allows you to make the changes described above.
-
Apply this setting to other users allows you to select one or more users (by user name or by name of the unit) to which you want to extend the selected option:

Enter a filter string, which can be a part of the name or a code of a unit. The value of the setting selected will then be applied to all users that match the search criteria entered (leaving the filter string empty, will be applied to all users).